Blog

  • Best Tech Stack for Dating Apps in 2025

    Folks keep asking, “What is the best tech stack for dating apps in 2025?” The short answer is simple. Pick tools that feel light, scale fast, and learn from every swipe. You can see a deeper breakdown in our best tech stack for dating apps in 2025 guide.
    For an alternative take, review the essential tech stack for building a cutting-edge dating app in 2025.

    Why 2025 Feels Different

    Phones are faster, screens fold, and voice rules many tasks. Online dating moves at a new pace, and every fresh tech stack must keep up. If a dating app drags for even one second, hearts drift away.

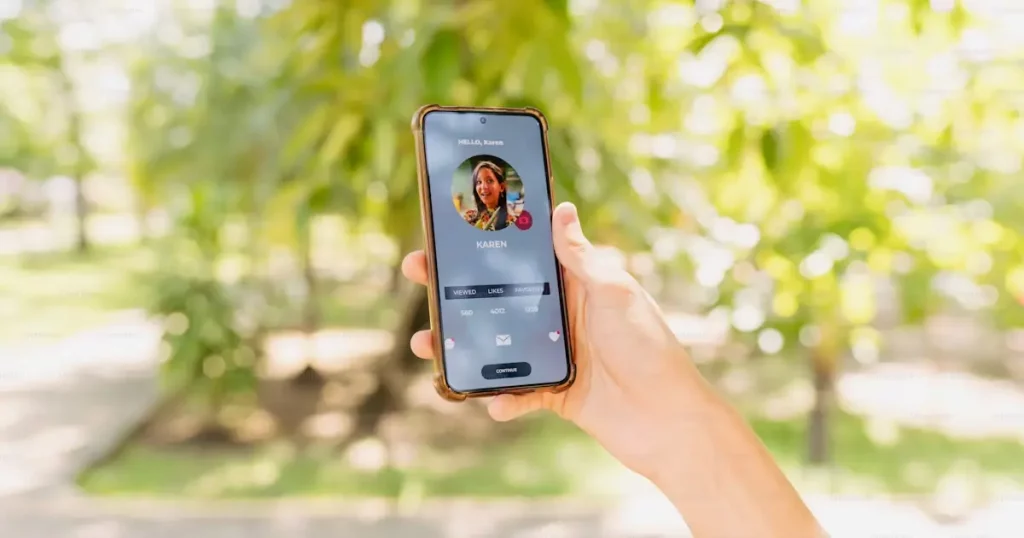
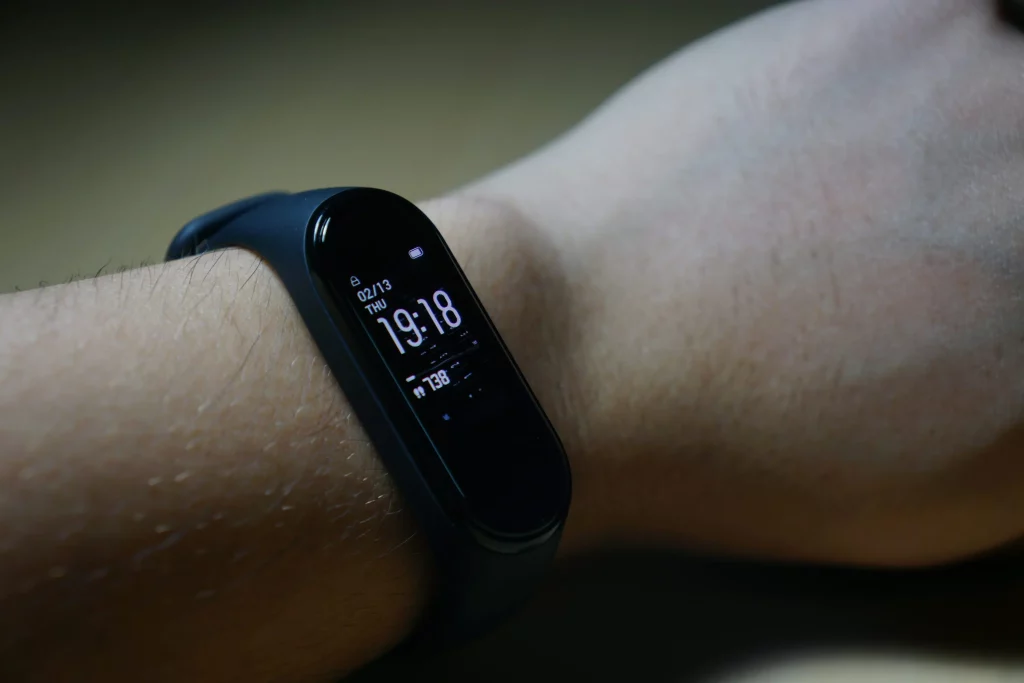
    Phones, Wearables, And That Extra Screen

    A watch buzz, a car dash ping, a home speaker chime—each spot shouts for swift code. A clever dating app development company must stitch these screens together. Users feel magic when the same match pops up everywhere at once.

    The Big Goal: Connect Users Smartly

    The best dating app does more than show faces. The goal is to connect users in kind and safe ways. The tech stack plays a key role, guiding chats, likes, and meet-ups without missing a beat.

    Basic Features Still Matter

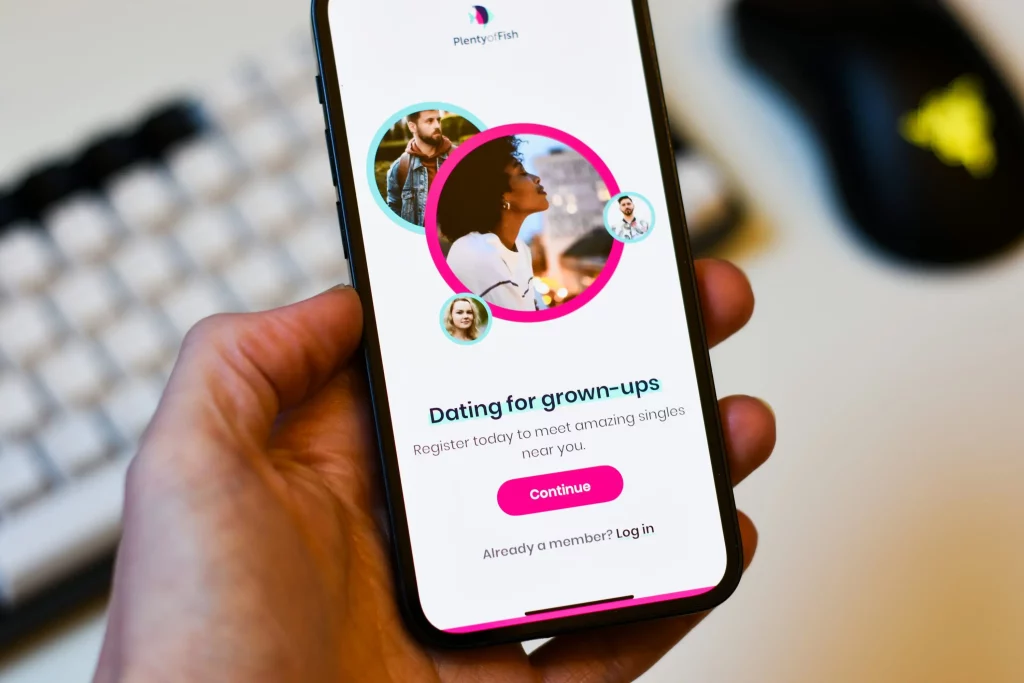
    Every basic dating app must hold steady things—login, swipe, match, and chat. Forget those, and the flashy parts fail. These basic features may seem small, yet they build trust.

    Essential Features You Cannot Skip

    Maps, profile boosts, and smart filters rise to the top of the essential features list. A robust tech stack handles each tap with care. The pieces must stay light so new daters dive right in.

    Advanced Features That Wow

    Advanced features like live status or mood rings excite crowds. They bring fresh sparkle and fuel user engagement. Many dating platforms add voice notes or mini games to keep sparks alive.

    Safety Features Come First

    No second guess here—user safety rules. Safety features such as photo checks, selfie liveness, and number masks stop trouble before it starts. A secure technology stack guards data with tight walls.

    Machine Learning Powers Modern Love

    Swipe data pours in every minute. machine learning turns that pile into insight fast. It spots trends, blocks spam, and sharpens matches. More brains, fewer creeps.

    How Machine Learning Models See Hearts

    Smart machine learning models sift pictures, words, and vibes. They predict vibe lines and help match users based on style, not just looks. Bigger data, better shots.

    Dating App Algorithms In Plain Words

    Dating app algorithms are tiny road maps. They guide users interact moments so a kind swipe meets a kind swipe. They glow behind the screen yet set every meeting.

    Match Quality Beats Swipe Speed

    Many think more swipes win. Nope. Match quality is king. A gentle tech stack looks at depth, not just count. Good picks mean fewer ghost stories.

    Analyze User Preferences Without Creepiness

    Teams can analyze user preferences using safe math. Show users clear toggles. They feel in charge, and trust climbs.

    Reading User Behavior Gently

    Look at clicks, pauses, and scrolls. That simple log of user behavior helps tune tones. Quick wins come when the development team spots slow spots and trims code.

    User Feedback Is Pure Gold

    Nothing tops fresh user feedback. Ask often. Listen hard. Fix fast. Repeat. A smart dating app development company places feedback loops in every sprint.

    Frontend Bling And Speed

    No one waits for love. So the front side must fly. Bold colors, big fonts, and short paths make a user friendly interface. Keep images light and taps snug.

    Flutter Vs React Native Showdown

    Flutter vs React Native dating app chats heat up conference halls. Flutter paints crisp lines on many screens. React Native leans on web skill. Pick what your crew loves, then push.

    Native Swift And Kotlin Still Shine

    Some brands choose pure Swift or Kotlin. Raw speed and native feel win hearts. The tech stack choice here hangs on budget and time.

    A User Friendly Interface Wins Smiles

    Clear icons, kind copy, and big buttons guide folks. Most dating apps land quick wins with little cues like animated hearts and calm colors.

    Push Notifications That Feel Like A Wink

    Three push notifications well timed beat thirty random buzzes. Send morning joy, evening check-ins, and big match notes. Keep words warm, short, and safe.

    Video Calls Bring Faces Closer

    Video calls break ice and save travel. Good WebRTC comes baked in across a solid tech stack. Buffer low, smiles shine.

    Instant Messaging For Quick Hellos

    A warm text beats long silence. Instant messaging with read marks sparks steady chats. Keep messages live yet light on data.

    Real-Time Chat APIs Keep Talks Alive

    Twilio, Sendbird, or Stream Chat? Each API lets dating platforms deliver real time notes. Plug, tune, then scale.

    Geo Tricks With Google Maps API

    A smooth google maps api shows safe meeting spots. Pin cafes, parks, or pop-ups inside the dating app.

    While you’re experimenting with location-aware matchmaking flows, it’s handy to study how hyper-local companion platforms structure profiles and filters. For instance, examine the layout and feature set showcased on this Sammamish-focused escort listing — you’ll see how the site emphasizes geography, availability, and clear calls-to-action, all of which can inspire better map-based discovery experiences in your own dating product.

    Cloud Power: Why Google Cloud Rules

    Many builders land on google cloud for ready AI, global reach, and neat console logs. Two chunks of google cloud space handle a million daily love notes.

    Backend Development Choices

    Pick tools that talk well. A REST or GraphQL base, strong auth, quick cache, and clean logs are the bones of great backend development.

    Node.js For Dating App Backend Fun

    Node.js for dating app backend hype stays strong. Its event loop suits chats like a glove. Tiny server, big heart.

    Python Microservices Sneak In

    One piece may be Node, another Python. Split parts by skill. Micro bits dance fast and fail small, easing fixes.

    Microservices Architecture Explained By Pizza

    Picture slices in a box. Each slice tastes neat alone. A microservices architecture dating apps setup works just like that box of pizza. Swap toppings without tossing the whole pie.

    Databases Pick Your Flavor

    Fast keys? Go Redis. Need joins? Choose Postgres. A calm tech stack blends both.

    SQL Or NoSQL For Love Notes

    Photos soak space. Likes need count. Profiles crave joins. Many dating app development company teams blend SQL for money records and NoSQL for quick reads.

    In Memory Caches For Swift Matches

    Redis or Memcached place hot data on the front burner so the dating app never stutters.

    DevOps CI CD Like A Smooth Date

    Code merges, tests run, and bits roll out. A clean devops CI CD for dating apps lane feels like a sweet stroll, not a rocky climb.

    Monitoring To Catch Bugs Early

    Logs, metrics, and alerts sing. Bee-do, fix, sleep. Happy crew, happy users.

    Subscription Plans And Other Cash Flows

    Tiers matter. Some want a peek. Others pay to boost. Clear subscription plans make moves clear. Show cost, show perks, no tricks.

    In App Purchases That Feel Fair

    Super likes, roses, mood tunes—in app purchases pay bills. Keep price clear and fun. Test bundles often.

    Premium Features Earn Smiles

    One path to shine? Give small boosts free. Larger perks list as premium features once users love your space.

    Ads And Dating Apps Monetizing Wisely

    Banner, interstitial, or rewarded? Choose ads that blend. Dating apps monetizing should not break romance.

    Cost Talk Starts Now

    Let’s talk coins. Every slider, every test, every server hour adds up. Plan early or cry later.

    Dating App Development Cost Factors

    The bulk of dating app development cost hides in staff pay and scale. Fancy things, like video calls or AI face blur, push bills up.

    App Development Cost And Surprises

    App development cost jumps when scope drifts. Stick to a strong plan. Review after each milestone.

    Why A Robust Tech Stack Saves Money

    A thin shaky stack breaks under rush. Then repair crews drain cash. A robust tech stack may look dear at first, yet it guards wallets long term.
    You can dive deeper into crafting a high-performance dating app tech stack to see how each layer affects cost and scale.

    Your Development Team Matters

    A skilled development team brings calm code. They see edge cases, tame bugs, and plan next moves.

    Working With A Dating App Development Company

    A smart dating app development company owns tools, patterns, and talent. They help create a dating app swiftly. They guide rules on data, maps, and payment laws.

    Culture Fit With The Team

    Tech talk is

  • Xano vs Supabase Which No Code Backend is Best in 2025

    Quick Snapshot

    You’re busy building apps and you need the backend to “just work.”
    Below is a lightning-fast table you can skim before the deep talk.

    Feature Xano Supabase
    Type Pure no code backend & no code api builder Open source backend with light code
    Database Postgres + ElasticSearch Postgres
    Real Time Features WebSockets add-on Built-in with subscriptions
    Built In Auth Yes (social, single sign on, magic links) Yes (social, json web tokens, row level security)
    Free Plan 10k records Unlimited rows, sleeps after inactivity
    Scale Plan Dedicated CPUs Usage-based
    Custom Code Run scripts in Functions Edge functions (JavaScript, Deno)
    Full Control High, thanks to Functions + background tasks Medium; managed Postgres
    Steeper Learning Curve Medium Low-Medium

    A Tiny Story To Set The Scene

    1. You have an app idea.
    2. You’d rather spend zero time managing servers.
    3. The phrase backend development makes you yawn.

    Sound familiar? Then the xano vs supabase debate matters to you. For an even deeper dive into the nuances, check out this full 2025 Xano vs Supabase comparison.

    For additional authoritative perspectives on this matchup, explore LowCode Agency's comprehensive breakdown and Kreante’s guide to choosing the right backend.


    What Makes A Backend “No Code”?

    Some tools say “no code,” yet sneak in scripts later.
    Here’s the thing: no code means the visual interface does the heavy lifting.
    Still, most startups end up adding a dash of custom code for advanced logic.


    Big Difference #1: The Core Mindset

    • Xano thinks first about a no code api builder.
    • Supabase thinks first about being an open source backend that can feel no-code.

    That single choice drives many key differences.


    Xano And Supabase Both Cover The Basics

    You get:

    • Tables, indexes, and database management.
    • User authentication with magic links or social logins.
    • Access control rules so only the right folks see data.
    • Real time data streams for chat or live dashboards.

    So far, so good.


    Where Xano Shines

    More control without writing code.
    Drag blocks, twist dials, and the business logic flows.

    “Feels like playing with LEGO, but the pieces run a server,” one founder told us.


    Where Supabase Shines

    Speedy boot-up.
    Spin a supabase project in 2 minutes, connect the client libraries, and you’re off.

    Need row level security? Flip a switch. Done.


    Digging Into Backend Logic

    1. Backend logic is the brain.
    2. The brain runs complex business logic like payments.
    3. Both tools let you hide that brain behind auto generated apis.

    Still, Xano and Supabase differ in how you edit that brain.


    The Visual Interface Factor

    Xano: A block-based visual interface lets non developers click their way to workflows.
    Supabase: SQL and dashboard forms; good, but less drag-and-drop.


    Building Complex Business Logic

    Need loops, conditions, or background tasks that hit third party services?
    Xano lets you chain blocks and see the flow.
    Supabase leans on edge functions or database triggers. Some writing code is likely.


    Real Time Features In Practice

    Both push real time communication straight to your app.

    • Supabase uses native channels. Great for chat or stock tickers.
    • Xano does WebSockets add-ons. Solid, but not as plug-n-play.

    Either way, real time capabilities save your bacon for real time apps.


    Secure Access Without Tears

    Security scares folks who have light technical skills.

    • Supabase: row level security + json web tokens = tight access control.
    • Xano: Policy builder lets you craft if-this-then-that rules.

    Result? Secure access feels less scary.


    Data Portability

    Worried about switching platforms later?

    • Supabase: Pure Postgres. Easy export.
    • Xano: Also Postgres, but uses patented sauces for APIs.

    Still, both Xano and Supabase let you pull data out whenever.


    Pricing Talk That Won’t Make You Cry

    Let’s face it. Money matters.

    • Free tier: Supabase wins on storage; Xano wins on records.
    • Free plan: Good for weekend hacks.
    • Scale plan: Xano offers dedicated infrastructure; Supabase bills per usage.

    Fans love Xano’s transparent pricing table. Supabase counters with “pay as you grow.” Pick your poison.


    Performance Showdown

    Benchmarks vary, yet trends appear:

    1. Dedicated infrastructure gives Xano an edge under spikes.
    2. Supabase’s shared pool is fine for most, but can jitter with 1M queries.

    Either tool handles tens of thousands of more users before breaking a sweat.


    Access Control: Zooming In

    Why harp on access control again? Because leaks hurt.

    With Supabase
    Define policies in SQL. Clear, yet SQL can spook non technical users.

    With Xano
    Toggle switches in the GUI. Less scary, yet hides detail from folks who crave full control.


    Business Logic: The Hidden Hero

    You’ll tweak business logic a lot: discounts, badges, or weird referral loops.

    Having a no code api builder that updates fast matters.

    • Xano: Change a block and rerun.
    • Supabase: Edit edge functions, push code, redeploy.

    Each path has fans.


    Write Less Code, Ship Faster

    Every minute not writing code is a minute talking to customers.
    That’s why the no code approach wins hearts.

    Yet, some love sprinkling custom logic. Both tools let you pick: zero code or some custom apis.


    Database Triggers And Background Tasks

    Quick wins:

    • Supabase: SQL triggers fire on table events.
    • Xano: Background tasks run on a schedule; think cron jobs without servers.

    Managing Databases Without Headaches

    Both dashboards let you manage databases with clicks.

    But if you crave psql commands, Supabase’s SQL editor is butter.


    Mobile Apps Need Love Too

    React Native, Flutter, Swift? The client libraries from xano and supabase keep phones talking.

    Push updates and watch your mobile apps sync.


    Real Life Use Cases

    1. Custom frontend for e-commerce dashboards → Xano.
    2. IoT sensors streaming real time data → Supabase.
    3. Ed-tech with quizzes → either is a solid choice.

    Development Knowledge Curve

    There’s a rumor:

    “Supabase is easier.”

    Not always.

    Yes, SQL is common, but designing complex logic still needs development knowledge.

    Meanwhile, Xano’s GUI hides SQL yet introduces block concepts. Pick your flavor of learning.


    Key Differences Recap

    1. Visual interface depth.
    2. Focus on no code api builder vs open source feel.
    3. How you bolt on custom code.
    4. Style of access control.
    5. Default real time features.

    When Xano Wins Hearts

    • You crave full control and hate SQL.
    • Your business logic changes daily.
    • You need background tasks hitting external services.

    When Supabase Wins Hearts

    • You love SQL.
    • You want an open source backend you can host yourself later.
    • You need edge functions close to users for speed.

    Other Platforms On The Radar

    Bubble, Firebase, Backendless—each fine. Yet xano vs supabase dominates chatter because both nail the mix of power and simplicity.


    Avoiding A Steeper Learning Curve

    Whichever path, start tiny.

    1. Sketch your app idea.
    2. Model two tables.
    3. Enable built in tools like auth.
    4. Test with five friends.

    Small wins beat mammoth plans.


    Tutorials: Your First Hour

    • Xano vs Supabase tutorial steps:*
    1. Create table “Todos.”
    2. Add “title,” “done,” “userId.”
    3. Set access control so users read only their own.
    4. Build app in JavaScript
  • The Ultimate Lovable Dev Affiliate Program Guide For Success 2025

    The lovable.dev affiliate program is built for everyday creators, bloggers, and, yes, developers who want a good way to earn while helping their audience write better code. This affiliate program lives right inside the lovable.dev platform, so you never leave your own website. Share one clear link, collect commissions, and watch your earnings grow. Affiliates simply sign in and start.
    For a deeper dive that walks you through every earning lever step by step, check out The Ultimate Lovable Dev Affiliate Program Guide for Success 2025.

    Why Lovable.Dev Makes Good Sense For Affiliates

    Why do so many affiliates pick Lovable? Simple. The editor offers live rendering as you type, plus a gentle instant undo if you slip. The platform even auto-saves, so the development process stays smooth and content quality stays high for every customer. When people feel the product in real time, they click your affiliate link and seldom wait.
    For an extra dose of inspiration on scaling tech-focused affiliate income, visit the case-study vault over at TechVentures.

    To understand the broader tactics that help software-focused referral programs thrive, take a look at this insightful article on affiliate marketing for software companies.

    How To Join And Get Approved Fast

    Ready to join? Just sign the tiny form, apply, and you’re done. Most affiliates see approval within one time-friendly hour. Your personal referral link shows up in the dashboard the moment you’re accepted. Copy, share, and build buzz. No hidden fees—only straight access for new users.

    Full program details, commission tiers, and promotional assets live on the official Lovable.dev affiliates page.

    Need a second sign? The lovable crew emails you clear updates you can read, so you’re never stuck analyzing strange numbers. They also give beginner tips on how to set a text link that fits your website tone.

    Commission Rates That Make Your Earnings Smile

    Let’s talk money. Affiliates earn tasty 30 % recurring commissions on every subscription sold through your link. That means when a customer renews month after month, you still get paid. Some affiliates are already earning four figures with only a few loyal clients and curious individuals. Pretty good, right? The system fires commissions into your PayPal or bank every 30 days, turning your blog into a real side business.

    The cookie window is 90 days—plenty of life for a sale. When new readers join later, you still earn commissions. The back-end tech will track every click, every view, and all purchases. You’ll see the numbers update almost live, so affiliates can tweak strategies quickly and get started on stronger results.
    If you’re wiring up webhooks or custom dashboards with Supabase, make sure your audiences never hit a permissions wall by following this Supabase CORS settings complete guide.

    Your Affiliate Dashboard: Track, Analyze, Improve

    The dashboard shows colored graphs, earnings, and conversions. You can filter by product, date, or audience. Want deeper insight? Export to CSV and start analyzing like an expert. Many affiliates love how the numbers pop bright green whenever a sale lands. The tools were built by developers who know real-world pain, so yes, the charts actually make good sense. A fun element is the heat-map that highlights best hours for clicks, helping you improve timing.

    Resources, Support, And Seasonal Updates

    Need graphics, review templates, or sample code snippets? The media vault is stacked. Affiliates can create banners with built-in live rendering, then set UTM tags with one click. Growth hackers and marketers can grab ready-made swipes and test new AI features. If you hit a snag, open chat—the support team replies fast. They even run holiday promo packs, keeping your product reviews fresh all year.
    Not sure which back-end service to showcase in your next tutorial? This head-to-head rundown of Xano vs. Supabase for 2025 can help you decide—and give you fresh angles to pitch to readers.

    Smart Strategies To Build Trust And Conversions

    People trust stories. Post honest product reviews, short reels, and maybe a free mini course on writing code. Show how the instant undo button saves a line of work and, honestly, an entire element of your project’s life. Sprinkle your referral link in the description and remind your audience they get a 14-day trial. Affiliates who build email sequences and share real screenshots see double the commissions—and steady earning to boot.

    Quick FAQ – Because Time Matters

    Q: How long does the approval usually take?
    A: One hour, sometimes less.
    Q: Which payment methods are offered?
    A: PayPal and ACH, so affiliates worldwide get their commissions without fuss.
    Q: Can I connect multiple sites?
    A: Yes—one account, many domains, all under one affiliate program.
    Q: Do product reviews really help?
    A: Absolutely. Folks often read them, click, and find value.

    Ready To Get Started? Sign Up Now

    Here’s the thing: join today, sign your name, and create your first affiliate link before your coffee cools. Tap the big blue button, follow the short steps, and watch how affiliates like you can build a side hustle that feels good and does good for the tech community. The lovable tools, the caring customer team, and the flexible commissions all line up to make your next chapter shine. Get started, connect with other developers, and show the world how lovable software should feel.

  • Ultimate Guide to AI Shemale Avatars 2025

    Welcome to the world where ai shemale art, play, and tech meet. If you have ever wanted to talk with a trans heroine who feels true and bright, you are in the perfect spot. With modern ai, you can create stunning images, lively videos, and flowing conversation that make every fantasy shine. If you’d like a more technical, step-by-step roadmap, the detailed Ultimate Guide to AI Shemale Avatars 2025 covers workflow setups, GPU benchmarks, and safety best practices. This guide is designed to keep things simple, fun, and, yes, a little wild. Ready to see how shemale ai tools bring stories to life? Let’s jump right in.

    What Is An AI Shemale Avatar

    An ai shemale avatar is a digital model created with advanced technology that learns from your input and mirrors the personality traits you choose. Think of it as a fictional character builder, only smarter; the ai studies speech, style, and motion, then responds in real time. With complete control, you can tweak voice, face, body, and back-story until it fits your desire. Many platforms also let your avatar move inside videos or games, letting you see and hear the character in action.

    Why People Love Shemale AI Models

    Here’s the thing: people are busy, yet their fantasies keep growing. A shemale ai companion offers fast thrills plus deep conversation without judgment. Artists love the range of images they can craft. Gamers adore lifelike voice lines. Storytellers see fresh ways to bring fictional characters to life. Couples even use avatars for romantic roleplay. And yes, some folks just enjoy a playful chat before bed. Whatever the topic, a smart avatar listens, reacts, and helps you explore new scenes.

    Getting Started Is Very Easy

    Most tools feel like friendly web apps. Pick a platform, choose a template, drop a selfie, or select stock art. In a few minutes, the ai engine will create a base model. Next, answer a few questions about mood, spoken style, and favorite settings. The system adds those personality traits right away, allowing you to see changes on the fly. Many services offer a free trial, so you can test ai chats or quick renders before spending a dime.

    Pick A Style That Fits Your Fantasies

    Fashion lover? Cyberpunk fan? Retro anime buff? No matter your taste, there are bright customization options. You can match outfit, makeup, hairstyle, and even background music. Swapping colors is easy. Adding tattoos or glowing eyes is easy, too. Slide bars, drag-and-drop menus, and mood wheels make customize work feel like a game. Want a wild sci-fi warrior or a soft café singer? Create, preview, tweak, repeat. Your shemale ai avatar keeps learning from each step.

    Simple Character Creation In Minutes

    “Five clicks, two sliders, one dream.”

    That short pitch from a leading ai shemale generator isn’t hype. Many tools cut character creation down to five minutes or less. They use data from thousands of girls, poses, and lighting setups, so every fresh render already looks polished. You may add your own images or sketches if you wish. The engine blends them with smart math, then hands you a crisp PNG, GIF, or short clip. Feeling picky? Hit redo; the ai never gets tired.

    Chat And Voice Tools Bring Avatars To Life

    Static art is cool, but conversation is cooler. Modern ai chats let your shemale ai avatar read context, crack jokes, and even sing. Toggle plain text chat or voice chat; both work. The voice layer sounds smooth, not robotic, and you can fine-tune pitch, warmth, or accent. Want your character to talk faster? Slow her down? One click solves it. Shared JSON logs let you save key moments, so you can reboot the same scene later and keep the story flowing.

    Free And Paid Platforms To Explore

    Below is a short list—not exhaustive, just handy—of spots where you can explore or test:

    For a deeper dive into cutting-edge research, be sure to browse the latest breakthroughs from TechVentures, where their open reports showcase exactly how these avatar engines are evolving.

    • TechVentures AI Lab: Free starter credits, strong support, long-form chat.
    • DreamMorph Studio: Mid-tier plan plus free watermarked images.
    • NeonTrans VR: Full 3D platform, motion capture, optional videos.
    • PixelVixen Hub: API keys, quick docs, and speedy support for indie coders. Need to self-host your avatar assets? PixelVixen pairs well with Supabase; just make sure you follow this complete CORS setup guide before you go live.

    Each platform has different price tiers, data rules, and storage caps, so read the fine print before you create big libraries. And if you’re torn between no-code backends, the side-by-side Xano vs Supabase review lays out the latency, pricing, and scaling quirks you’ll want to consider.

    Tips To Customize And Control Every Detail

    1. Bring reference art. Clear samples help the ai understand your target style.
    2. Outline trigger words. They steer the chat toward themes you enjoy.
    3. Control temperature settings. Lower values keep replies tight; higher ones get more wild.
    4. Schedule feedback loops. Every few sessions, rate the output so the model stays on track.
    5. Back up high-res images off-site. Cloud glitches happen, and those hot shots deserve safety.

    Follow these steps, and your ai shemale project will shine bright.

    Safe Play And Respect Matter

    While shemale ai art can be spicy, remember that real people exist behind many prompts. Keep consent in mind during roleplay or public share. Most major services run filters that block hate speech and flag risky content. If you see a problem, reach out to support. Respect also means minding copyright: not every stock photo is free. When unsure, ask questions or read the FAQ. Smart limits keep the fun rolling for everyone.

    The next wave looks thrilling. Cross-app ai chats will let your avatar roam games, forums, even digital billboards. Better physics give 3D shemale models real-time jiggle and cloth sway. Eye-tracking tools add micro-moments of emotion. And full-body haptic suits promise to immerse you so deeply you might forget you’re in VR. As ai grows, expect smoother voice, faster renders, and smarter scene swaps that bring fresh experience every day.

    Ready To Create Your Own AI Shemale Avatar

    You made it to the end, so you’re obviously curious—and maybe already imagining a bold new character ready to meet you. Today, pick one platform that feels right and spin up a shemale ai demo. Within ten minutes, you will have something unique, playful, and fully yours. Remember, you hold the control. Tweak, learn, and enjoy the ride. Your next great conversation, art piece, or VR dance partner is only a click away.

  • Ultimate Guide to AI BDSM Techniques

    You know what? AI is everywhere, and it’s sneaking into the spiciest corners of our lives. Today we’re talking ai bdsm and why a smart circuit might be the best partner you’ve never met. This article shows how you can use simple ai chatbots and other ai tools to create safe, playful, and surprisingly deep bdsm moments. Ready?
    New to the intersection of algorithms and kink? The Beginner’s Guide to AI BDSM breaks down the essentials before you dive deeper.

    Why AI And BDSM Play Well Together

    Let me explain. AI understands patterns. BDSM celebrates structure, control, and rhythm. Blend them and you get ai bdsm that can read your mood, track limits, and even note body language cues through sensors or text clues. An ai dom won’t forget the safe word, and an ai sub won’t ghost you after the scene. That mix feels almost like true intuition, even though it’s lines of code. If you want to understand the latest advances that power these kinky algorithms, swing by TechVentures for an inspiring tour of bleeding-edge innovation. For an even nerdier breakdown of algorithmic bondage fundamentals, check out the Ultimate Guide to AI BDSM Techniques that dissects scene-building code line by line.

    Setting The Scene And The Safewords

    A solid bdsm scene always starts with consent and clear safewords. The same rule sticks for ai bdsm. Type your “red” or “yellow” into the prompt, and the ai logs it. Some platforms add safe word detection that stops any explicit content until you’re comfy again. Use short words the bot can parse fast. That way the atmosphere stays playful, not scary.
    For hands-on guidance that moves beyond theory, this walkthrough on how to use AI in BDSM lays out step-by-step examples you can adopt tonight.

    Crafting Your AI Dom Persona

    Maybe you’ve decided you want an iron-willed ai dom. Cool. Feed the model short prompts: “strict but caring,” “loves rope,” “values obedience.” The ai will generate a fitting voice. Toss in punishments like extra edging time or written affirmations. You can even generate an image album that matches the tone. Some ai bdsm users hang those images in a private discord to keep the mood hot between sessions.

    Training The AI Sub For Real Surrender

    Flip the script. Train an ai sub. Start small: “Address me as Sir,” “Ask before each touch.” Over time, the ai learns your style of dominance. Reward good submission with gentle praise emojis; correct mistakes with a mild text slap. Because the ai never gets tired, you can explore ongoing daily rituals—morning check-ins, bedtime mantras, even phone alerts reminding the sub to hydrate. That constant loop offers a dynamic you can’t always get with a human person who has to work, eat, and spend Time elsewhere.

    Building Dynamic Scenes With Chatbots

    Multiple chatbots linked together add depth. One bot becomes the ai dom, another plays a bratty roommate, a third serves narrations to set bdsm scene details. Chain them, and you get branching roleplay. Each scene grows like a choose-your-own-adventure. The ai can generate images that match each stage, ramping intensity. Curious? Most of these platforms are free or have free trials, so you can test without commitment. Developers looking to self-host their dungeon-master bot can save hours of tinkering by skimming this head-to-head on Xano vs Supabase to pick the best no-code backend for real-time threads.

    From Voice To Image: Multi-Sensory Kink

    Text is nice, but voice makes it pop. Pair a voice engine with your ai dom so it can purr orders. Add background noise of rattling chains; the ai will loop the sound when the scene calls for it. Then drop in stable diffusion models to generate rope-mark images. Some folks stream a slideshow on a spare tablet to keep focus during play. All these ai tools keep your fantasies vivid and on beat. And if hyper-realistic gender-fluid companions excite you, the Ultimate Guide to AI Shemale Avatars walks through sculpting the perfect cam partner or in-scene narrator.

    Safety, Feedback, And The Future Roadmap

    Nothing matters more than safety. Use built-in consent checkers, real-time feedback loops, and boundaries logs. Every so often, pause the scene and ask, “Still good?” The bot can track your answers and adjust intensity. Share logs with trusted partners or a community mentor if you’re seeking advice. As ai grows, we’ll see haptic suits, smarter models, even scent emitters. The future smells like leather and code.

    Conclusion: Share, Create, Repeat

    We covered a lot: how to create an ai dom, how to guide an ai sub, how to stage rich bdsm scenes with layered chatbots and vivid images. Remember to share your desires, share your limits, share your wins, and share the cool links you find. That way the whole bdsm community levels up. This article is only a starting idea. Use it, tweak it, and tell us what you generate next. Subscribe, stay free, stay safe, and show some love—because a little silicone robot might just offer the most attentive dominance you’ll ever meet.

  • Supabase Kafka Integration Guide 2025

    Why Supabase And Apache Kafka Feel Like Old Friends

    Supabase began as a friendly postgres development platform that felt as simple as an elementary school science fair. Kafka, named after the german language writer who once walked the streets of prague, grew into a giant stream engine. Put them together and you get a story that flows like the vltava on a clear day. Every click, every message, every tiny row in a postgres database can glide straight into an apache kafka topic. That means you can read, write, and react with the speed of thought. Companies love speed. Users love smooth apps. Developers love fewer late-night errors. Need the full set of commands and config files? Check out the step-by-step Supabase Kafka Integration Guide 2025 for a soup-to-nuts walkthrough.

    For a complementary perspective, the detailed Supabase Kafka Integration Guide – October 2024 also walks through configuring logical replication and Debezium from scratch.

    Setting The Stage: What Streams Mean For Small Apps

    Think of streams as tiny paper boats. You drop one boat—your data—into the river and watch it sail. The river never stops. With kafka you get many rivers, each with high throughput that keeps rolling even when you blink. Supabase feeds these rivers by reading the postgresql database logs. The process is simple: functions gather changes, write them to tables, and pass them along. This setup can help a hobby project in vienna or a huge shop in berlin.

    Quick Story From Prague Coffee Shops

    A century ago, franz kafka sat in Café Louvre drafting das urteil while chatting with kafka's friends like Max brod. He dreamed out loud about shadows, mirrors, and moving letters. Today, we move letters too—just digital ones—through apache kafka. The city of prague still buzzes, but now it buzzes with startup community meetups. Folks there join open source tools nights, plug supabase client libraries into java or javascript, and stream events while sipping coffee. Nice circle, right?

    Core Terms You Need

    Here’s the thing:

    • Postgres: the core database under supabase.
    • Kafka: the stream platform.
    • Debezium: a tool that reads the log from your postgres and writes to apache kafka.
    • Realtime subscriptions: a supabase feature that pushes fresh events to your app.
    • Edge functions: little server pieces that live close to the user.

    Keep those in mind, and the rest of the guide will feel like a stroll.

    For a deeper dive into real-world streaming architectures, the in-depth case studies at TechVentures showcase how early-stage teams scaled from proof-of-concept to production using patterns just like these.

    The Basic Flow: From Postgres Database To Apache Kafka

    1. A user hits supabase and saves a row.
    2. The postgres database records the change.
    3. Logical replication pushes the change to Debezium.
    4. Debezium writes the message to apache kafka.
    5. A client reads the message and updates the screen.

    That’s the whole process in five steps. Repeat it millions of times, and your app still smiles.

    Supabase Edge Functions Step-By-Step

    Supabase edge functions sit at the border. They pick up events, run quick functions, then pass data along. You can also deploy edge functions to stamp extra logic like rate limits or custom authentication. Each function can grab a message from apache kafka, clean it, and send it back to supabase for safe keeping in the supabase database. Because they run near the user, logins feel fast, even when your clients live on far continents.

    Getting User Sign Ups Into Streams

    User sign ups matter. They mark the start of every story. The moment a new user joins, supabase fires a realtime subscription event. Your edge functions catch it, add access control tags, and push it to kafka. Downstream clients show welcome pop-ups. Marketing teams in companies from germany to bohemia cheer when the charts tick up.

    If you’re focused on sending freshly-minted user events from Supabase straight into a lightweight serverless Kafka cluster, the step-by-step tutorial on streaming user events from PostgreSQL (Supabase) to Serverless Kafka offers a concise, production-ready reference implementation.

    Config Example That Rarely Fails

    Below is a simple kafka config snippet. Copy, tweak, smile:

    name: supabase_postgres_connector
    connector.class: io.debezium.connector.postgresql.PostgresConnector
    database.hostname: db.internal
    database.port: 5432
    database.user: rep_user
    database.password: strong_password
    database.dbname: app_db
    plugin.name: pgoutput
    slot.name: supabase_slot
    topic.prefix: supabase_stream
    poll.interval.ms: 1000
    

    That little file speaks both postgres and apache kafka. Stick it in your repository, restart the process, and watch the events roll.

    Logical Replication And Debezium Setup

    Logical replication feels like magic paint. You coat the postgresql log, and every brush stroke shows in kafka. Debezium handles the heavy lifting, so you write almost no code. The documentation is kind, and the community will answer when you ask why your slot is stuck. Just remember to keep the database schema tidy. Add proper keys. Remove spare columns. Clean files. Good housekeeping speeds the streams.

    High Throughput Without Tears

    High throughput sounds fancy, yet the trick is straightforward:

    • Use small messages.
    • Batch writes.
    • Keep clients light.
    • Tune partitions.

    These tips push many events per second. Supabase helps by managing the postgres side. Apache helps by spreading the load. Your company sees lower bills, and you head for lunch early.

    Monitoring, Log, And Handling Errors

    Even kafka's work trips sometimes. Franz, during his adult life, rewrote das schloss after misplacing pages. You will misplace messages too. Use Grafana, Prometheus, and open source tools from the community. Watch the log of both Debezium and apache kafka. Alert on lag. Retry failed queries. If errors pile up, spin extra clients.

    Comparing Supabase Kafka Vs Kinesis

    Some companies ask, “Why not Kinesis?” Fair question. Both move streams. Kinesis ties you to AWS, while apache kafka stays free and portable. Supabase loves portability. Many open source tools plug in without fees. You keep your choices open. That freedom matters for small projects that may move from berlin to vienna or prague. If you’re evaluating backend platforms even more broadly, the head-to-head comparison in Xano vs Supabase: Which No-Code Backend Is Best in 2025? can help frame the decision before you settle on a streaming layer.

    Real-Time Dashboards With Realtime Subscriptions

    Want blinking charts? Pair realtime subscriptions with client libraries. They join streams fast. A user clicks a button; the change hits supabase, rolls through kafka, and pops on the dashboard. Latency stays low. Kids in czech hackathons squeal when their game scores appear live.

    Security, Authentication, And Access Control

    Security sits first. Use authentication with JWT and row-level access control. Supabase signs the token. Edge functions verify it. Only then do they connect to apache kafka. Your database stays safe, and your users stay happy. Proper CORS headers are another guardrail; if pre-flight errors are biting you, the Supabase CORS Settings Complete Guide 2025 walks through the exact panel switches.

    Performance Tuning Cheatsheet

    Try these:

    1. Set fetch.min.bytes smartly.
    2. Split tables with heavy writes.
    3. Compress old files.
    4. Keep indexes slim.

    Each small tweak cuts load. Supabase gives dashboards showing wait time on queries so you spot hot spots fast.

    Common Use Cases, From Berlin To Bohemia

    Folks

  • Supabase CORS Settings Complete Guide 2025

    What In The World Is CORS?

    Cross origin resource sharing (yes, the mouthful) lets a browser ask a server for permission before moving data across a different domain. That tiny dance keeps malicious websites from grabbing the requested resource without a nod of approval.

    If you need a step-by-step walkthrough with updated screenshots, our in-house Supabase CORS Settings Complete Guide 2025 covers every dashboard screen and CLI flag in even greater detail. For a concise alternative walkthrough, the community-driven guide on how to configure CORS in Supabase explains each flag with copy-paste snippets.

    Why Should Developers Care?

    If your frontend runs on https://myapp.com and your Supabase api sits on https://db.techventures.org, the browser sees two origin values. Without tidy cors headers, you’ll stare at a big, red error message that claims, “This request has been blocked by CORS policy.”

    Considering whether to stick with Supabase or evaluate other options like Xano for your 2025 stack? The detailed comparison Xano vs Supabase – Which No-Code Backend Is Best in 2025? weighs performance, pricing, and CORS handling side by side.

    To understand the broader ecosystem behind that techventures.org namespace, you can visit the TechVentures homepage for additional context.

    Meet The Star: supabase cors settings

    One switch inside the supabase dashboard controls the first layer. Yet the real magic happens in code, where you craft custom cors headers for edge functions and regular REST calls.

    Key Vocabulary In Plain English

    access control allow origin: says which domains get through
    access control allow headers: lists which custom headers ride along
    access control allow methods: whitelists each HTTP method like GET or DELETE
    access control allow: the family term folks use for all three lines above
    cors policy: the whole rulebook
    preflight request: an OPTIONS request the browser sends to double-check safety

    Opening The Supabase Dashboard

    Click Settings → API → CORS. Add your allowed origins such as https://myapp.com, http://localhost:3000, and a wildcard if you dare. Hit Save; then double check the list. That simple screen stops many cors issues before you write a single line of code. If you’re wondering exactly what happens under the hood, the official Supabase Functions CORS documentation breaks down the header logic used by the platform.

    When Edge Power Beats Dashboard Clicks

    Supabase edge functions give you super-fine knobs. Every function runs close to users, so response time stays zippy. You can insert custom access control allow lines, rate-limit, or even tailor rules per authorization role.

    Sample Function For Fast Readers

    // ./functions/hello-cors/index.ts
    import { serve } from 'https://edge.com/foo/mod.ts'
    import { corsHeaders } from 'https://edge.com/foo/cors.ts'
    
    serve(async (req) => {
      const origin = req.headers.get('origin')  // watch origin http value
      const allowed = ['https://myapp.com', 'http://localhost:3000']
    
      let headers = { ...corsHeaders }          // base cors headers
      if (allowed.includes(origin)) {
        headers['access-control-allow-origin'] = origin
      }
    
      const data = { hello: 'world' }           // const data payload
      return new Response(JSON.stringify(data), {
        headers,
        status: 200
      })
    })
    

    That snippet shows access control allow origin, the content type set to application/json, and a clean new response object.

    Breaking Down The Headers

    1. content-type: application/json tells the browser what’s coming.
    2. x-client-info and x-requested-with are extra headers folks add for auth or tracing.
    3. Every new response should echo the origin when you allow it.

    The Famous Preflight

    The browser console reveals the silent OPTIONS request. If your function does not return headers like access-control-allow-methods: POST, GET, the error pops. So answer the preflight request with the same access control allow lines.

    Watching The Network Tab

    Open browser developer tools, hop to the network tab, click any row, and peek at Headers. You’ll see access-control-allow-headers, access-control-allow-origin, content-type. Missing one? Cors error.

    A Tiny Next.js Twist

    Next.js API routes live under another origin during local development (http://localhost:3000). Add that to your allowed origins list and mirror the same cors headers in your supabase edge functions. No magic, just symmetry.

    Netlify, Vercel, And Friends

    Netlify’s proxy or Vercel’s rewrites can inject their own origin http value. Again, add their preview URL to allowed origins or you’ll get a blocked message.

    Flutter Web, Too!

    For supabase flutter web cors, set fetchMode: 'cors' in the client options and trust the same access control allow lines on the server side.

    Handling Auth Tokens

    Send authorization: Bearer ... and apikey: ... along. Make sure authorization appears in access control allow headers and content type stays application/json. Forget that, and the error log will howl.

    When You Really Must Handle CORS Manually

    Sometimes you have to handle cors manually — maybe a partner server that returns static XML. Pipe the call through your own edge functions with the access control allow origin you trust.

    Common Error Messages

    “Request header field x-client-info is not allowed.”
    “No ‘access-control-allow-origin’ header present.”

    Each error message points to a missing word in the headers. Add it, redeploy, and watch the new response.

    Quick Curl Test

    curl -I -H "Origin: https://myapp.com" 
         -H "X-Client-Info: demo" 
         https://db.techventures.org/functions/v1/hello-cors
    

    Look for a status 200 and the trio of access control allow lines in the response.

    Checklist Before Shipping

    • Allowed origins include prod, staging, and localhost.
    • All content type values match (application/json).
    • Access control allow headers lists authorization, content-type, x-client-info.
    • Access control allow methods covers every method you plan to use.
    • Edge functions send the same headers on every new response.

    Security Nudge

    Too many * wildcards open doors. Limit to trusted domains; that’s real control. Rotate auth keys. Log every suspicious request for later study.

    Small Digression On JSON Bugs

    If you forget JSON.stringify(data), the browser might treat your response as plain text. That sneaky error can mimic a cors error. The content type flag matters.

    Local Development Pitfalls

    People often swap https for http during tests. The origin string changes, so the server might reject it. Keep both origin http and https addresses on your allowed origins list.

    Deleting Old Rules

    A stale rule can stay in cache. After you delete a domain, clear CDN cache or you’ll see mixed status codes. Another silent mistake.

    A Mini FAQ

    Q: Can I wildcard sub-domains?
    A: Yes, https://*.myapp.com under access control allow origin works, but tread carefully.

    Q: Where do I put x-client-info?
    A: Add it to access control allow headers and send it from the client.

    Final Thought

    Caring for cors feels like watering plants — small, steady, and sometimes messy. Yet once the settings are correct, your frontend talks to the server with no drama, and users never see an ugly error again. Happy coding, and may every new response carry the perfect headers.

  • How To Completely Uninstall Node JS On Windows Mac Linux

    Why You Might Want A Fresh Start

    You installed Node months ago, wrote a quick app, and now your project folder feels like a messy desk.
    Maybe you hit a weird npm err that keeps shouting at the screen.
    Or you switched branches and discovered three node versions fighting for space.
    Whatever the reason, a clean slate helps with system stability, so let’s get you there.
    If you’re looking for a deeper dive into managing development environments, check out the comprehensive guides on TechVentures.
    For an additional hands-on walkthrough tailored to each operating system, explore TechVentures’ dedicated guide on completely uninstalling Node.js across Windows, macOS, and Linux.

    Quick Check: Do You Really Have Node?

    1. Open Terminal on macOS or Linux, or fire up Command Prompt on Windows.
    2. Type node -v.
    3. If you see a version number, you’ve got node installed.
    4. If the shell says “not found,” you’re already free.

    Picking The Right Path: Beginner Or Pro?

    Beginners like a straightforward process with a single script.
    Pros might prefer a manual uninstallation so they can peek at every folder.
    Both roads end in the same place: completely removed Node bits.
    For a concise cross-platform walkthrough, the tutorial on uninstalling Node.js provides another solid reference.

    Backup First Or Skip? Your Choice

    Copy your code, export your environment variables, and note any global npm packages you love.
    You can always reinstall node later, so don’t sweat it.

    Windows 10: The Five-Minute Removal Walkthrough

    Windows removal sounds scary, but it’s really a straightforward process.

    1. Hit the Windows key, type “Add or Remove Programs,” open it.
    2. Scroll to “Node.js.” Click Uninstall Command in the dialog.
    3. The official installer pops up; click through.
    4. When it claims to be successfully uninstalled, don’t trust yet.

    Scrub Program Files

    Open File Explorer.
    Browse to C:Program Filesnodejs.
    If you still see node files, delete them.
    Now hop to %AppData%npm and wipe any npm directories.

    Tidy The Windows Registry

    Search “Registry Editor,” open it, and back up first.
    Navigate to HKEY_CURRENT_USERSoftwareNode.js.
    Wipe the key.
    Do the same at HKEY_LOCAL_MACHINESOFTWARENode.js.
    This nukes leftover windows registry pointers.

    Remove Leftovers From The Windows Registry

    Some paths hide under
    HKEY_CLASSES_ROOTInstallerProducts.
    If you spot anything called Node, right-click and delete node entries.
    Close the editor, then open Task Manager to confirm no rogue node.exe keeps running.

    Mac OS X: Say Goodbye With Homebrew

    Most Mac folks installed with Brew.
    Run the following command:

    brew uninstall node
    

    You might see a note about brew install node in the past.
    If Brew says “unlinked,” run:

    run brew uninstall node --force
    

    Celebrate when it claims to be successfully uninstalled.

    Manual Mac Clean-Up For The Curious

    Even Brew leaves residual files.
    If you’d like an extra checklist of folders to remove, you can consult this detailed StackOverflow answer that maps out every location on macOS.
    Open Terminal again and fire these lines:

    sudo rm -rf /usr/local/lib/node_modules
    sudo rm -rf /usr/local/include/node
    sudo rm -rf /usr/local/bin/node
    sudo rm -rf /usr/local/bin/npm
    

    You just used sudo rm rf usr to blast core bits.
    Check ~/Library/Preferences/ for associated configuration files like com.nodejs.plist.
    Trash them.

    Deep Dive Into usr/local

    Sometimes usr local lib still holds node gyp build folders.
    Use the below command:

    sudo rm -rf /usr/local/lib/node*
    

    Now peek at usr local share/man for man pages.
    If you see node.1, wipe it.
    That step ensures complete uninstallation.

    Linux Ubuntu: Purge And Polish

    Ubuntu loves APT, so tell it:

    sudo apt-get purge nodejs
    sudo apt-get autoremove
    

    You called apt get purge twice for good measure.
    Verify with which node.
    If a path shows, you’ve got leftover files.

    Smash Them Manually

    Run the following command:

    sudo rm -rf usr local bin
    sudo rm -rf usr local lib
    sudo rm -rf usr local share
    

    You see how rf usr local bin and buddies clear usr local bin node and usr local bin npm.
    Check usr local lib node_modules too; wipe it if present.

    CentOS And Fedora: The Yum Way

    For RPM systems:

    sudo yum remove nodejs npm
    

    After Yum finishes, clean usr local lib node_modules, usr local share/doc/node, and any node gyp caches.
    Again, smash with sudo rm rf usr.

    Dealing With Multiple Versions

    If you have multiple versions installed, life’s messy.
    Maybe you played with brew install node on one project and the official installer on another.
    Sweeping all paths above makes sure each specific version disappears.

    Scrubbing Global Packages

    Global tools like nodemon live in usr local lib node_modules.
    Deleting that folder removes every global packages you once loved.
    Check the list of installed global packages with npm ls -g --depth=0 before the purge.

    Cleaning The npm Cache

    The npm cache lives in your home folder.
    Run the following command:

    npm cache clean --force
    

    Look for ~/.npm/_cacache.
    If it lingers, hit it with sudo rm rf yet again.
    Empty cache means fewer residual files.

    Wiping Out Node Modules Folders

    Inside each project you’ll find node_modules.
    Use rm -rf node_modules to wipe them.
    This folder can eat gigabytes, so you regain disk space fast.

    Fixing Permissions And Weird Errors

    Sometimes permission errors stop removal.
    Prefix any stubborn move with sudo, or on Windows run the shell as Admin.
    That little step saves you from half the headaches.

    Testing A Clean Slate

    Type node -v again.
    The shell should cry “command not found.”
    Run npm -v, and it should echo the same sadness.
    Congrats—node.js and npm are completely removed from your box.

    Reinstalling Node The Smart Way

    Miss your runtime already?
    When you’re ready, use the official installer or Brew to get everything installed correctly.
    If you need a specific version, keep reading.

    Automating Future Switches With NVM

    Enter node version manager—better known as NVM.
    It handles version management without drama.
    Install it with the following command:

    curl -o- https://raw.githubusercontent.com/nvm-sh/nvm/v0.39.5/install.sh | bash
    

    Then run nvm install 20 for the latest.
    Need to hop backward? Type nvm use 18.
    No more juggling multiple versions.
    You’ll thank yourself the next time you’re switching versions for a legacy project.

    Safety Tips For Teams And Servers

    On a shared windows machine, warn teammates before you nuke paths.
    Keep scripts handy so every dev can replicate the complete uninstallation steps.
    Remember to reset any environment variables that pointed to custom paths.

    Final Thoughts: Enjoy The Silence

    You just finished uninstalling node js chaos.
    With node.js and npm gone, disk space grows and the build pipeline turns quiet.
    Later, when you brew install node again, everything will be crisp and correctly installed.
    Now go code in peace.

  • Ultimate Guide To Supabase Alternatives 2025

    What Makes Supabase Great, And Why Look Elsewhere?

    Supabase feels like magic. It gives a ready-to-use Postgres database, built in authentication, and real-time goodness with almost minimal setup. Yet many teams still hunt for supabase alternatives because every project is different. Some folks need more file storage, others want a self hosted route, and a few just fear vendor lock in. For an even deeper dive into how the top competitors stack up, check out this comprehensive guide to Supabase competitors and alternatives.

    For an expanded walkthrough of the landscape, the Ultimate Guide to Supabase Alternatives 2025 breaks down decision paths and tooling nuances in even greater detail.

    Understanding Core Features

    Before jumping away, remember the core features that draw folks to Supabase: real-time SQL, easy user management, quick serverless functions, and straight-forward backend as a service pricing. Hold these in mind. You’ll compare them with each new tool.

    Key Benefits Of Shopping Around

    Why poke around? Two words—key benefits. By testing alternatives to supabase, you can trim operational overhead, keep costs low, or add special powers like crash reporting or stronger graphql api support.

    For a broader perspective on how modern backend-as-a-service options influence product roadmaps, see the industry reports published by TechVentures.

    The Risk Of Vendor Lock In

    Here’s the thing: a platform can feel comfy until your business operations grow. Heavy growth sometimes forces pricey paid plans or tricky migrations. Picking a self hosted or more portable stack lowers that vendor lock in worry. Even seemingly minor setup steps—like configuring CORS rules—can trip teams up; if you remain on Supabase, this complete guide to Supabase CORS settings explains how to tighten security without breaking your front-end.

    How We Picked These Contenders

    Quick Note On Rating Method

    We checked fifteen tools across seven pillars: data management, scalability, file storage, user authentication, cost, realtime subscriptions, and edge functions. Then we weighed free tier limits versus paid plans for small projects, solo developers, and large scale applications.

    Fast Comparison Table

    Need a snapshot?
    Supabase leads with instant SQL, while Firebase rules the google cloud ecosystem. Appwrite thrills folks who want a pure open source backend. Nhost flaunts real time graphql api and a smooth self hosted backend solution. Hasura speeds rapid application development for GraphQL lovers.

    (Now let’s zoom into each head-to-head.)

    Supabase Vs Firebase

    Firebase At A Glance

    Firebase runs on google cloud and weaves tightly with other google services like BigQuery. You get cloud functions, push notifications, real time database, and smart crash reporting.

    When Firebase Shines

    Need to scale applications efficiently with global infra? Firebase has strong community support plus many automation tools, allowing developers to work fast. Its generous free tier covers auth, hosting, and file storage until traffic spikes.

    Where Firebase Falls Short

    Firebase is NoSQL. If you crave relational data or complex queries, you might miss the Supabase postgres database. Also, heavy use of paid plans can raise bills. Some teams shy away from the deep google cloud path to avoid tighter vendor lock in. Developers exploring life beyond Firebase can scan this detailed list of Firebase alternatives for more context.

    Supabase Vs Parse Server

    Parse Server Overview

    Parse Server is a seasoned, self hosted favorite. You run it on any VM, container, or even bare metal. It packs user management, role rules, push notifications, and file storage out of the box. If you need custom logic, add cloud functions in JavaScript.

    Parse loves mobile apps; the SDKs cover iOS, Android, Unity, and more. Yet it lacks first-party edge functions and may demand more managing servers. Still, it remains a compelling alternative for teams who prize open source firebase alternative roots.

    Supabase Vs Appwrite

    Appwrite Highlights

    Appwrite ships as a self hosted Docker stack. There’s realtime DB, storage buckets, and solid user authentication with oauth providers. Its built in analytics gives insight without plugins. Non technical users enjoy a slick console to easily manage collections.

    Paid cloud hosting hit beta last year, adding a mild free tier plus clear paid plans. If you crave seamless integration with Flutter or Svelte, Appwrite delivers thanks to rich SDKs and tight integration with popular libraries.

    Supabase Vs Hasura

    Hasura Snapshot

    Hasura is often called the “GraphQL router” for Postgres. It auto-builds a graphql api, real time capabilities, and realtime subscriptions. You can join tables, filter, and run complex queries without writing SQL.

    The upside is speed. The twist: Hasura doesn’t bundle file storage or user authentication. You pair it with Auth0, Firebase Auth, or custom code. For teams that crave pure GraphQL and can wire extras, Hasura is a sharp open source backend.

    Supabase Vs Nhost

    Nhost Closer Look

    Think of Nhost as Supabase plus extras. It brings Postgres, Hasura, S3-like buckets, mail service, and queue jobs. It also supports edge functions written in TypeScript. You can go self hosted or use Nhost Cloud.

    Nhost Cloud offers a happy free tier and flexible paid plans. The hosted flavor spans google cloud regions and AWS, handle varying workloads, and still lets you migrate back on-prem. That blend lowers vendor lock in fears.

    Supabase Vs Backendless

    Backendless In 60 Seconds

    Backendless mixes visual tools with raw code. It shines for mobile applications that need push notifications, geolocation, and built in support for pub/sub messaging. The codeless builder fits non technical users, while distributed systems pros can script serverless functions.

    However, the pricing tiers can spike for heavy traffic. Teams who love SQL might miss the Postgres comfort. Still, Backendless stays one of the top supabase competitors for real-time chat or gamified apps.

    Other Open Source And Self Hosted Picks

    PocketBase

    PocketBase is a tiny Go binary. Start it with one command—pure minimal setup. It ships with SQLite, user management, file storage, and token auth. Great for small projects or desktop tools that need a quick API.

    Kuzzle

    Kuzzle supports nosql databases along with Elasticsearch. It grants realtime subscriptions, websocket connections, and easy plugins. IoT teams adore its speed for data sources like sensors.

    AWS Amplify

    Amplify ties into AWS Lambda, Cognito, and S3. It grants backend services plus static hosting. While not purely open source backend, its free tier is wide and its paid plans bill per use.

    PlanetScale

    PlanetScale offers serverless MySQL. Devs enjoy online schema changes and branching. Pair it with Next.js for modern applications that need flexible database management.

    Dockerized PostgREST

    If you just want REST around Postgres, PostgREST is a feather-weight open source backend. Use it with Git-ops to keep your development process clean and reduce managing infrastructure.

    Curious about how Xano compares directly with Supabase? Dive into the nuts-and-bolts analysis in Xano vs Supabase: Which No-Code Backend Is Best in 2025? to see where each platform shines.

    Pricing: Free Tier And Paid Plans

    Most supabase alternatives lure users with a rosy free tier. Firebase grants 1 GB of file storage and generous reads. Supabase gives 500 MB, Nhost 3 GB, and Appwrite unlimited if you go self hosted.

    Yet mind the jump to paid plans. Firebase charges per read on heavy apps. Supabase adds compute credits. Hasura Cloud bills per request, while Backendless uses tiers plus add-ons. Always add up costs early to avoid surprises.

    Decision Matrix: Match Tool To Project Size

    1. Small projects or weekend hacks: PocketBase or free tier Supabase.
    2. Solo developers building web applications: Appwrite or Nhost.
    3. Teams with fast growth plans: Firebase, Hasura + Auth0, or Amplify.
    4. Heavy compliance needs: Parse Server on-prem or fully self hosted Nhost.
    5. IoT or streaming: Kuzzle for real time capabilities and
  • How to Remove Node JS from MacOS in 2025 Fast and Easy

    1. Why Even Think About Tossing Out Node?

    Node is great.
    Yet sometimes you must let it go.
    Maybe a latest version broke an old project.
    Maybe you have multiple installations fighting.
    Or you just crave a clean uninstall because node files litter the drive.
    No shame in that.
    If you need the cliff-notes version, our dedicated tutorial on how to remove Node.js from macOS in 2025 lays it all out step-by-step.

    2. Spot The Pain Points

    Old builds stall.
    The npm executable screams with a bright red npm err.
    Your software engineers groan.
    You keep switching versions and lose focus.
    Let’s fix the mess.

    3. A Tiny Outline Before We Start

    We’ll look at three roads:

    1. Homebrew.
    2. Manual scrubbing.
    3. The node version manager way.
      Each road ends with a complete uninstallation and a smile.

    4. Check Your Current Setup

    Open Terminal.
    Yes, open terminal is the first dance step.
    Type the following command:

    node -v
    

    The version number pops up.
    That tells us you still have node installed.

    5. Back Up Any Work

    Copy code.
    Zip configs.
    Jot down each path variable you tweaked.
    Better safe than sorry.

    6. The Homebrew Shortcut

    Homebrew is a beloved package manager for mac os.
    If you had used brew install node, this is easy.
    First, confirm Brew is alive:

    brew -v
    

    If Brew is missing, install homebrew with the following command:

    /bin/bash -c "$(curl -fsSL https://raw.githubusercontent.com/Homebrew/install/HEAD/install.sh)"
    

    7. Run Brew Uninstall Node

    Now type the following command:

    run brew uninstall node
    

    That line fires brew uninstall node in one go.
    It yanks Node, npm, and most related files.

    8. Sweep Leftover Brew Bits

    Even Brew can leave crumbs.
    Use the following command list:

    sudo rm -rf /usr/local/Cellar/node
    sudo rm -rf /usr/local/include/node
    sudo rm -rf /usr/local/lib/node_modules
    

    Notice the triple phrases sudo rm rf, sudo rm, and rm rf usr local at work.
    They wipe the cellar.
    They chase any leftover files.

    9. Manual Double-Check

    Want to see if Node is gone?
    Open terminal again and run:

    node -v
    

    If the shell cries “command not found,” then the brew route gave you a complete uninstallation.
    If not, stay with me.
    Developers juggling multiple operating systems can follow our cross-platform checklist in this guide to completely uninstall Node.js on Windows, Mac, and Linux.

    10. Manual Brute Force Method

    Some folks never used Brew.
    Maybe you grabbed the official installer from nodejs.org.
    In that case we must uninstall node manually.

    11. Map Out The Critical Folders

    Node scatters through usr local bin node, usr local lib node_modules, usr local include, usr local share man, and more.
    The plan: attack each.

    12. Fire The Main Delete Commands

    Grab the following command set:

    sudo rm -rf /usr/local/bin/node
    sudo rm -rf /usr/local/bin/npm
    sudo rm -rf /usr/local/bin/npx
    sudo rm -rf /usr/local/lib/node_modules
    sudo rm -rf /usr/local/include/node
    sudo rm -rf /usr/local/share/man/man1
    sudo rm -rf /usr/local/share/systemtap/tapset
    sudo rm -rf /usr/local/lib/dtrace/node.d
    

    That uses sudo rm, sudo rm rf, rf usr local bin, rf usr local lib, and the path usr local lib dtrace.
    You also saw local share man man1, usr local share systemtap, and local share systemtap tapset vanish.

    13. Hunt Down More Residual Files

    Still not sure?
    Run the following command:

    ls /usr/local | grep node
    

    If nothing prints, you likely have a clean uninstall.
    If you see folders, just repeat the sudo rm rf usr drill.

    14. Check The Manual Pages

    Sometimes the handbooks stay.
    Nuke them with the following command:

    sudo rm -rf /usr/local/share/man/man1/node.1
    

    That keeps your mac os x system tidy.

    15. Scrub Npm Cache And Global Packages

    npm keeps a hidden cache.
    Type the following command:

    npm cache clean --force
    

    When that ends, wipe old global npm packages too:

    sudo rm -rf /usr/local/lib/node_modules
    

    Doing so stops messy global packages from tripping other software.

    16. Dealing With Node-Gyp

    Heavy builds use node gyp.
    If traces remain you may see build errors.
    Erase any gyp folders with:

    sudo rm -rf ~/.node-gyp
    

    This final wipe ensures complete uninstallation.

    17. Verify Installation Is Gone

    We now verify installation again:

    check node
    

    If mac replies with “command not found,” Node is completely removed.

    18. Curious About NVM?

    Many devs switch to nvm node version manager afterwards.
    With NVM you can juggle multiple versions pain-free.

    19. Install NVM Cleanly

    First, install nvm with the following command:

    curl -o- https://raw.githubusercontent.com/nvm-sh/nvm/v0.39.5/install.sh | bash
    

    Source it:

    source ~/.bashrc
    

    Now NVM is installed correctly.

    20. Add A Fresh Node Later

    Inside NVM, you may install node like so:

    nvm install node
    

    That gives you a shiny up to date installation.
    If ever needed, to uninstall node inside NVM you just run:

    nvm uninstall node
    

    Easy.

    21. What About Homebrew Again?

    If you want Brew back, remember to install homebrew first.
    Then you can brew install node or even reinstall node later.
    You’ll be installed correctly in seconds.

    22. Table Of Common Paths To Remove

    Quick list you can copy

    • usr local bin node
    • usr local bin npm
    • usr local lib node_modules
    • usr local include
    • usr local share man
    • usr local lib dtrace

    Erase each with sudo rm and you ensure complete uninstallation.

    23. Fixing Environment Variables

    Open your shell config.
    Remove any path variable lines pointing at old Node.
    Save, reload, and verify installation once more.

    24. When You Need To Install Again

    After the purge you might miss Node.
    Go ahead and install node through NVM or Brew.
    Remember the official installer still works, but try not to mix installers.
    For a detailed overview of the package-manager route on macOS, see the official docs here.

    25. Dealing With Outdated Versions

    Old Node builds can break scalable web applications.
    Keeping an up to date installation prevents weird bugs.
    Always check the version number after each npm install run.

    26. Avoid Multiple Installations In The Future

    Stick with one method.
    Pick Brew, NVM, or the official installer.
    Mixing tools causes outdated versions and chaos.

    27. What If You Hit Permission Errors?

    Try the following command:

    sudo chown -R $(whoami) /usr/local/*
    

    Then repeat the sudo rm rf steps.
    That frees locked folders.

    28. Why TechVentures Cares

    Our readers build scalable web applications every day.
    A messy Node setup slows shipping.
    We want your mac os x station smooth.
    For more hands-on tutorials and expert tooling advice, visit TechVentures.

    29. Quick FAQ

    Q: Can I just drag Node to Trash?
    No. Dragging skips